This post will outline and explain in great detail how to install Windows 7, reinstall, upgrade, perform recovery, repair, restore and format.
If you have been searching for the detailed steps for installing
WINDOWS 7, then you have come to the right blog. I have spent countless hours
on this topic, searching forums and blogs but have come up empty handed. After
extensive trial and errors with the installation process, I have finally got
the hang of it. The procedure might be similar to everyone else’s but the
difference is in the details. I pay extra attention to the steps that others
just ignore.
After following the steps that I have mentioned below, you will be
amazed to find that how easy the setup process is. I will also try to give some
insight about some of the hardware issues that most of us face during the
Windows Installation process.
Back up Drivers and Files.
Before starting the installation process, always backup your important files and computer drivers. Backing up drivers will be very help full after the installation as you won’t have to waste time and energy searching for the drivers.
There are many ways of backing up drivers.
1. Batch
File(For Windows XP): I have provided a link to a batch file I created
which will easily backup all your installed drivers to a folder. After
installation you can install your drivers easily from this batch file.
2. Driver Back Up Programs:
There are a lot of softwares available on the internet that can back up your
drivers for you. Some are paid and some are free. Do some searching and you
will find them.
3. Manufacturer’s Website:
For most branded systems you can go to the respective manufacturer’s website
and download the relevant drivers from there. I recommend that you download all
the important drivers, like Video, Sound, Ethernet/Wireless drivers beforehand
to insure you don’t face and problems later.
NOTE: I
recommend that you follow all 3 methods so that you do not misplace the drivers
or accidentally delete them when installing windows. Just to be on the safe
side.
Installation:
I always recommend a clean installation, regardless of which windows version you intent to install. A clean installation will provide better stability and increased performance can be expected when installed to a clean hard drive or partition. If you have virus, malware or spyware issues, those will also be removed.
- Insert your windows 7 DVD into your DVD drive.
- Restart your computer.
- Now you need to access the Bios Setup. To access your bios setup, during the boot up press the Key Commands needed to access the BIOS, this will be a text message usually at the bottom or top of the screen. If your system has a splash screen with the OEM logo hiding the boot up screen, press ESC as soon as you start boot up.
- When you get to the BIOS, access the screen that allows you to change the boot sequence. Set it to boot from CD before hard drive in the boot sequence.
- Now your system will restart again and will show you the following screen. Follow the on screen instructions.
- Now the system will show that Windows is loading files. Wait for the process to finish.
- Now you will see the Windows 7 Boot Screen.
- You will have to accept the license agreement in order to continue with the setup.
- Now the setup will ask which type of windows you want to install, Upgrade or Custom. For a clean installation we will choose the Custom option.
- Now you will see the partition manager. Here you can choose how many partitions to create and the amount of space you want to allocate to each drive/partition. Click “DRIVE OPTIONS” for more options. Click on "NEW" to create a new partition. In the box provided enter the amount you want to allocate to the partition. For the C: Drive I always allocate 50.15GB. This is because after windows installation and all basic updates and softwares installed Windows 7 takes up almost 20.5GB of space. So always leave room for windows to grow. The calculation: 1GB = 1024MBFor 50.15GB = 50.15 x 1024 = 51354GB (Round Figure). Enter this amount or whatever amount you decide and hit APPLY.
- Hit FORMAT when you have created the partition. (NOTE: A system reserved drive will be automatically created of 100MB. Do not format this partition.)
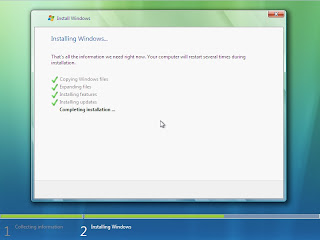
- Now you can leave the system for about 30-35 minutes while Windows 7 installs onto the hard disk. The Setup is completely automatic and the computer may restart a couple of times during this process. If the computer restarts, just leave it alone and don't press any key to boot from CD/DVD.
- After the installation is finished the Windows 7 Setup starts to analyze the computer and tweaks the performance and visual settings for optimal performance.
- After the analysis, you will be asked to enter some basic setting like your Name, License Key, Computer Name, Windows Update Settings, Time, Date and Time zone Settings and Computer Location.
- A welcome screen will appear and Windows will prepare your desktop for you. You will be taken straight to the desktop.
I hope the tutorial was helpful for everyone. If you have any suggestions are questions, leave a comment below.
If you want to install XP, Vista or 7, or you want the driver backup batch file, just click on the relevant links below.
How to Install | Reinstall Windows XP
How to Install Windows Vista
If you want to install XP, Vista or 7, or you want the driver backup batch file, just click on the relevant links below.
How to Install | Reinstall Windows XP
How to Install Windows Vista


